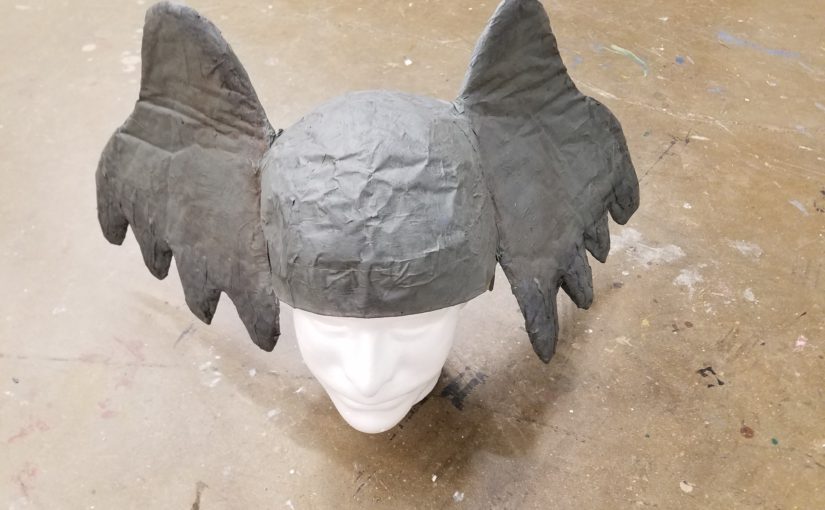
When I was working on Horton’s costume for Seussical, I didn’t find any costumes that I liked, so with my vision for what I wanted, I went to work making my own design. I had learned a technique from a friend where you use a plastic bag and masking tape to make a mold of the person’s head that you’re wanting to do a headpiece for, and that’s how my Horton hat began.


Supplies: 
- plastic shopping bag
- masking tape
- 2 padded mailing envelopes
- grey and brown paint
- hot glue gun
- hot glue
Step 1: Creating a Mold of the Actor’s Head
It’s best to create the head mold directly on the actor that will be wearing it so that it’s a custom fit. Otherwise it could be too small or too big (Please note that the Styrofoam head in the pictures was used for demonstration purposes only, as this was a completed project before my blog).
Start by placing the plastic bag over their head making sure not to cover their mouth or nose. I did make sure that their hair was covered so that I didn’t accidentally get tape in their hair. Next, using about 6″ long strips of masking tape, begin covering the head until there are 3 or 4 layers. Don’t make it too tight, or you’ll have difficulty getting it off of their head. After that, I marked on the headpiece with a pen where I wanted to trim, using their features (eyebrow line, ears, and back of the neckline) as boundaries so that the mask would sit comfortably and realistically on their head. Then I slipped the mask off of their head and trimmed the headpiece.


Step 2: Horton’s Ears 
I wanted the ears to have some dimension without being rigid, so I decided to use a couple of padded shipping envelopes (1 for each ear). I sketched out a design that I liked and cut out one ear first. I used this design to trace and cut out the second ear so that they would match. Once they were cut out, I put a layer of tape on them, front and back, sealing the edges as well. This way, they didn’t get droopy when I painted them.
Step 3: Pulling It All Together
I attached the ears to the head using masking tape. Strips about 4″ long worked well, with 2″ on the ear and the other 2″ on the head mold. Do this to both sides of each ear. Then to reinforce and help secure it, place tape across those strips of tape. Now, put a couple of layers of grey paint on it, making sure to let it dry completely between coats. *Hint: If you want to prop Horton’s hat on a Styrofoam head to paint it, you might want to consider covering the Styrofoam head with a couple of additional plastic bags like I did to protect it from paint.


Step 4: The Details
I looked at pictures of elephant ears to determine where I wanted the wrinkles/creases to go. To create the look, I put varying lengths (2″-3″ long) of thin, squiggly lines of hot glue near the end of the ears. When the hot glue hardened, I added a little watered down brown paint on the ear near where it attached to the head and blotted it with a dry piece of t-shirt (I’ve got loads of t-shirts, so when one meets its expiration date, it becomes a shop rag.). Then I used a watered down dark grey paint near the ends of both ears to help make the shadows stand out. I blotted this as well, careful not to take off too much. I did a lighter version of this technique all over the head for a leathery look. Here are the results:


Sis, I am just now viewing any post of yours, but would like to acknowledge your talents. I knew you were talented in the art world, but not to this extent I guess. Proud of you. Pray your God given talents will take you far.
Blessings,
Doris Thompson
Awe, thank you! I didn’t realize that you also had a blog; I’ll have to check it out!
Much love,
Mandy