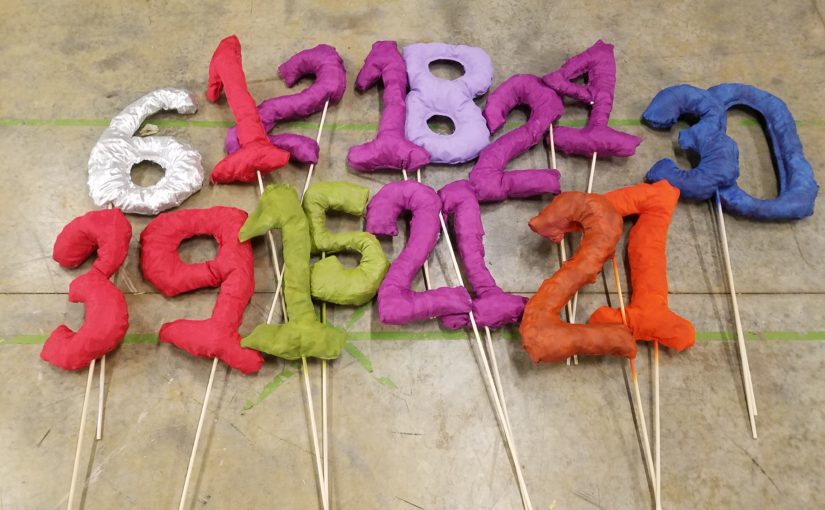
What do you do when you need balloon numbers in a pinch? Make them from fabric, of course. I needed several of these numbers for a particular show. The truth is, while I made these props last, I had a backup plan to make them all along in case I didn’t find the Mylar balloons that I had envisioned. The end product was well worth the wait. I knew that I wanted to fill the balloons with packing peanuts so that I could use them in my rehearsals and for all of my performances with no worry of having to replace them because they had deflated. My plan was to cut open the end, fill them with packing peanuts, reseal them with foil duct tape while hot gluing in the dowel rod for the handle. In the end, I think that making them out of fabric made them sturdier than I had originally imagined. Here was my process:
Step 1: My Supplies
- several large sheets of packing paper (collected over time from shipments)
- scrap fabric from leftover projects
- packing peanuts (collected over time from shipments)
- Sewing pins
- Dowels
- Hot Glue and Hot Glue Gun
- Fishing Line
- Spray Paint

Step 2: Making the Pattern
I wanted bubble shaped numbers about a foot and a half tall, so I grabbed several large sheets of packing paper. I’m pretty good at free-handing, so I drew out my first number and used it as a size reference for all of my other numbers. If you’re uneasy about this, I suggest tracing the numbers that you need onto a transparency and projecting them onto the paper to copy. I had the idea to mark my seam allowances, but in the end, this was an unnecessary step that I didn’t utilize. Once all of my numbers were drawn, I cut them out.
Step 3: Cutting Out My Fabric
I took my patterns and placed them over my fabric and pinned them in place, making sure to cut 2 at once so that I had a front and back for each number. I didn’t worry if I didn’t have enough of any color fabric. I liked the idea of my balloons being colorful, and I knew that if I didn’t like the way that they looked, I could always spray paint them. Since I had several numbers to make, I completed this step for all of my numbers before moving on to the next step so that I didn’t lose my rhythm.
Step 4: Putting Them Together 

At some point, I talked myself out of sewing them together, partially because I wanted to speed things along and also because hot gluing them ultimately sounded easier. For each number, I made sure that the two sides were matched up and decided on a central spot to keep open to stuff them. Then I folded half of the fabric back, glued the edge a bit at a time and sealed the two sides together, working my way around, making sure to leave a hole in the center for turning it inside out and for filling it. The next tidbit I learned the hard way: Don’t glue the center of a number with a hole in it until AFTER you have turned it inside out. I thought it would look sloppy gluing this with the raw edge sticking out, but it actually turned out really well. Next stuff the number with packing peanuts and seal it with hot glue. Finally, find the optimal position and angle for inserting the dowel, pull a tiny section of the fabric apart, apply a small amount of hot glue on the end of the dowel before inserting it so that it holds still once inside, and then once you’ve inserted it, hot glue the edge both to seal it and hold the dowel in place. For two digit numbers, I gave each number their own dowel, and then hot glued the numbers themselves together how I wanted them to look. I used a small piece of fishing line (aka monofilament) to secure the two dowels together. If you’re worried about this slipping up or down, you could always put a dab of hot glue to hold it in place, but I didn’t have any trouble with it.
Step 5: Aesthetics
I had a few two digit numbers that ended up being different colors. If I didn’t like the way they looked, I simply went over it with a coat of spray paint. Be sure to work in a well ventilated area for this, and apply thin coats, letting it dry in between coats, so that it doesn’t have drips or runs. Do this until you achieve a color you like. This project took several hours because I had so many numbers, but if you have lots of helpers, it could go a lot faster.


