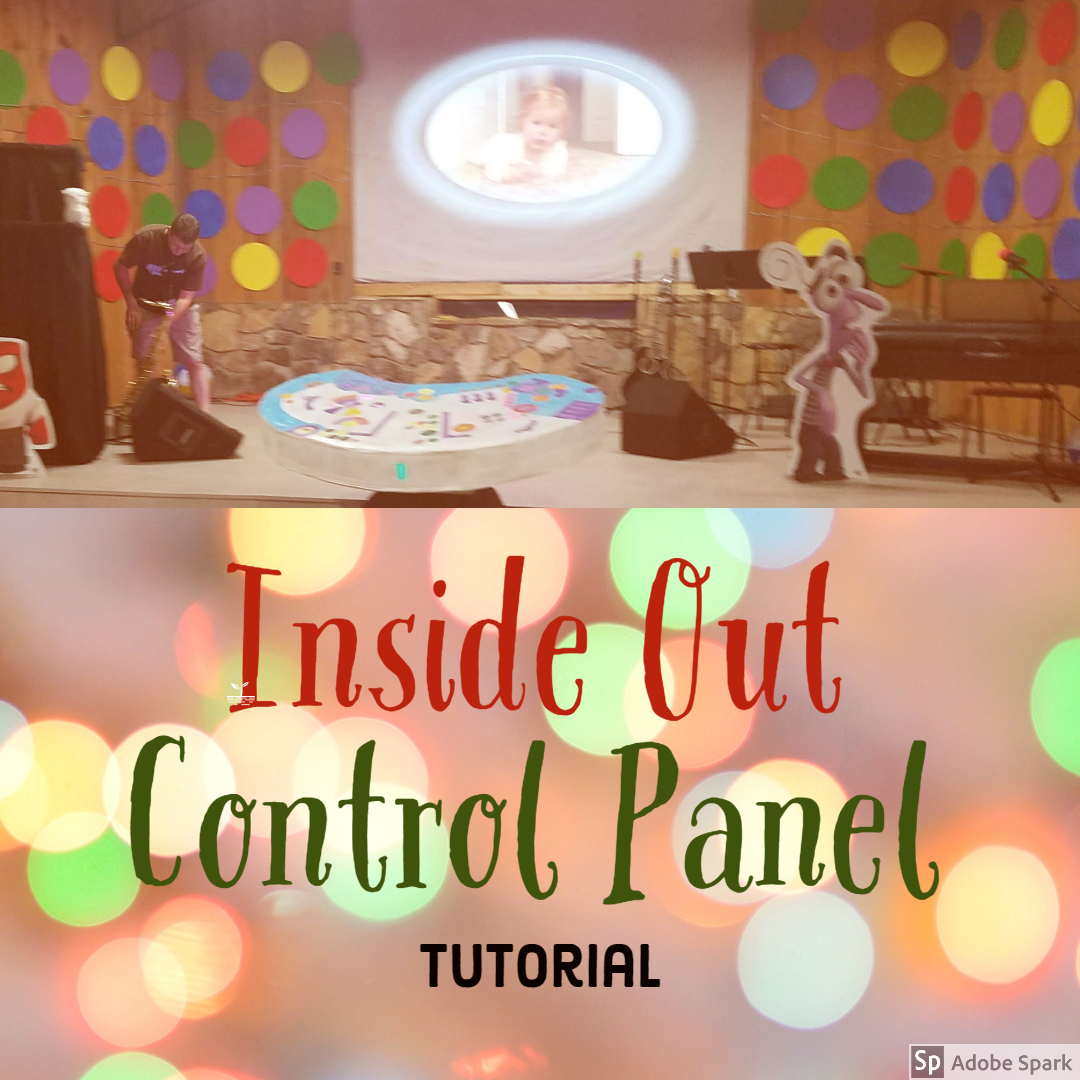
Inside Out Control Panel Prop Tutorial
The theme for the Kids Camp that I just attended was Inside Out, and for the finishing touch our camp director wanted to recreate the Inside Out control panel. It was a pretty easy prop to build, and the kids loved it!
Supplies:

- Large Cardboard Box (I used a TV box)
- Hot Glue Gun & Hot Glue
- 2″ Masking Tape
- Box Cutter or CANARY Corrugated Cardboard Cutter
- Paint/Paint Brushes
- 2 10 watt LED Flood Lights & 2 10 watt LED Stage Par Lights
- a Surge Protector
- Frosted Contact Paper
- 2″ Adhesive Black Hook and Loop Tape or Zip Ties
Step 1: Cutting Out the Design
The control panel is basically a bean shape, so I free handed this on the top of the TV box and cut out my design. Then I traced my design onto the back of the box and cut it out also. To keep it symmetrical, I flipped over my top design onto the bottom and trimmed off the excess. Next, I cut out the side of the box all the way around. Using 2″ Masking Tape I taped together the flaps that opened so that I could use that side also. Once cut out, I bent the side every inch so that it would be flexible.


Step 2: Assembly
I began hot gluing the side around the bottom of the box, working my way around. Be sure to have any lettering on the box face inside so that it will be easier to paint. Also, leave the back side of the control panel open for inserting lights. Once the sides were attached to the bottom, I attached the top, also using hot glue. Next, to insure a smooth finish, I covered all of the edges with masking tape. The box came with Styrofoam inserts, which I used to create a spacers to keep the center of my control panel from drooping. I built it up to the height of the box by breaking off Styrofoam pieces and taping them  together with masking tape. I then applied masking tape to the Styrofoam where I wanted to attach the spacer so that the hot glue wouldn’t melt it when I attached it.

Step 3: The Base
I thought about placing the control panel on an angled podium, but since we only had a couple on hand and needed those, I chose to create a base with an angled top out of cardboard. To do this, I cut out the sides with the angle that I wanted and then attached a top piece of cardboard using hot glue. If you need your piece to be mobile, you could attach the base to the top of the control panel using 2″ Adhesive Black Hook and Loop Tape (AKA Velcro). Otherwise, I recommend attaching the top to the bottom using Zip Ties. You could also use construction adhesive.
Step 4: Painting It
I started by priming everything white. Next, I drew on buttons, knobs, and sliders with a pencil while looking at an image of the control panel that I found online. While my design is very similar, I did not try to exactly replicate the image that I found online. To paint the Inside Out control panel, I used several quarts of paint that I had on hand and some paints from a craft project that the kids were working on at the time that I was doing the project along with some of my favorite craft brushes.
Step 5: Lighting
For the last step, I marked where I wanted holes made for the lights to shine through. These were then cut out with a box cutter since I didn’t have my CANARY Corrugated Cardboard Cutter with me. We added Frosted Contact Paper on the inside where we cut out the holes to help diffuse the light. Next, we inserted a couple of 10 watt LED Flood Lights as well as a couple of 10 watt LED Stage Par Lights and plugged them into a Surge Protector. Then we set the lights to change colors using the remote control.


In Conclusion:
This project took about 5 hours total to complete (including my design creation time). I think it would be pretty easy for a beginner to try, and the impact was awesome! The kids (and adults) absolutely loved the Inside Out control panel. We set it up with memory bubbles on the wall leading to a projection screen where we played “memories”. This project could be adapted to work well for any control panel that you want to create, such as a space ship control panel.


Hi! I enjoyed looking at your creations. I very often use insulation styrofoam for my large projects. I find that sanding blocks are an EXCELLENT way to get smooth, round edges. Looks great after it’s painted. —Judy